Send a Fetch Request
A fetch request asks an existing worker to supply credential details you don't hold — their new First Aid certificate, a renewed registration number, a missing document. The worker gets an email with a secure link; whatever they provide lands on their profile, verified where possible.
Use a fetch request for someone already in Oho. Use a recruitment check request to screen an applicant before they start.
Before you start
Every worker you're asking needs an email address on file. The whole request is an email with a link in it, so an address is the one thing Oho can't work around. It sends to the worker's work email, and falls back to their personal email when there's no work one.
Unlike the police check form, the fetch request screens don't warn you. The request is created and appears in the list, but it stays at Initiated forever — it never reaches Sent, because there's nowhere to send it. In a Bulk Send those workers aren't skipped or flagged either; they're counted in the "Send n Requests" total like everyone else.
A request stuck on Initiated with no email on the worker is the symptom. Add the address to the worker's profile and send a new request.
So before a large chase, especially one you're running from a list someone has just given you:
- Check the workers have addresses. A spreadsheet import happily creates workers with no email — Oho doesn't require one, and volunteers often have no work address at all.
- For anyone without one, pick a route. Either add an address to their profile and send the request, or skip Fetch for them and record the credential by hand from whatever they give you on paper.
- Give people their own address where you can. Oho doesn't require email addresses to be unique, so two workers can share a mailbox — but each link is personal to one worker, so whoever reads that mailbox receives and can answer both.
Fetch requests are included on the Plus and Premium plans. If Fetch Requests isn't in your left menu under Continuous, your plan doesn't include it — your account manager can tell you what you're on.
Step 1: Open Fetch Requests
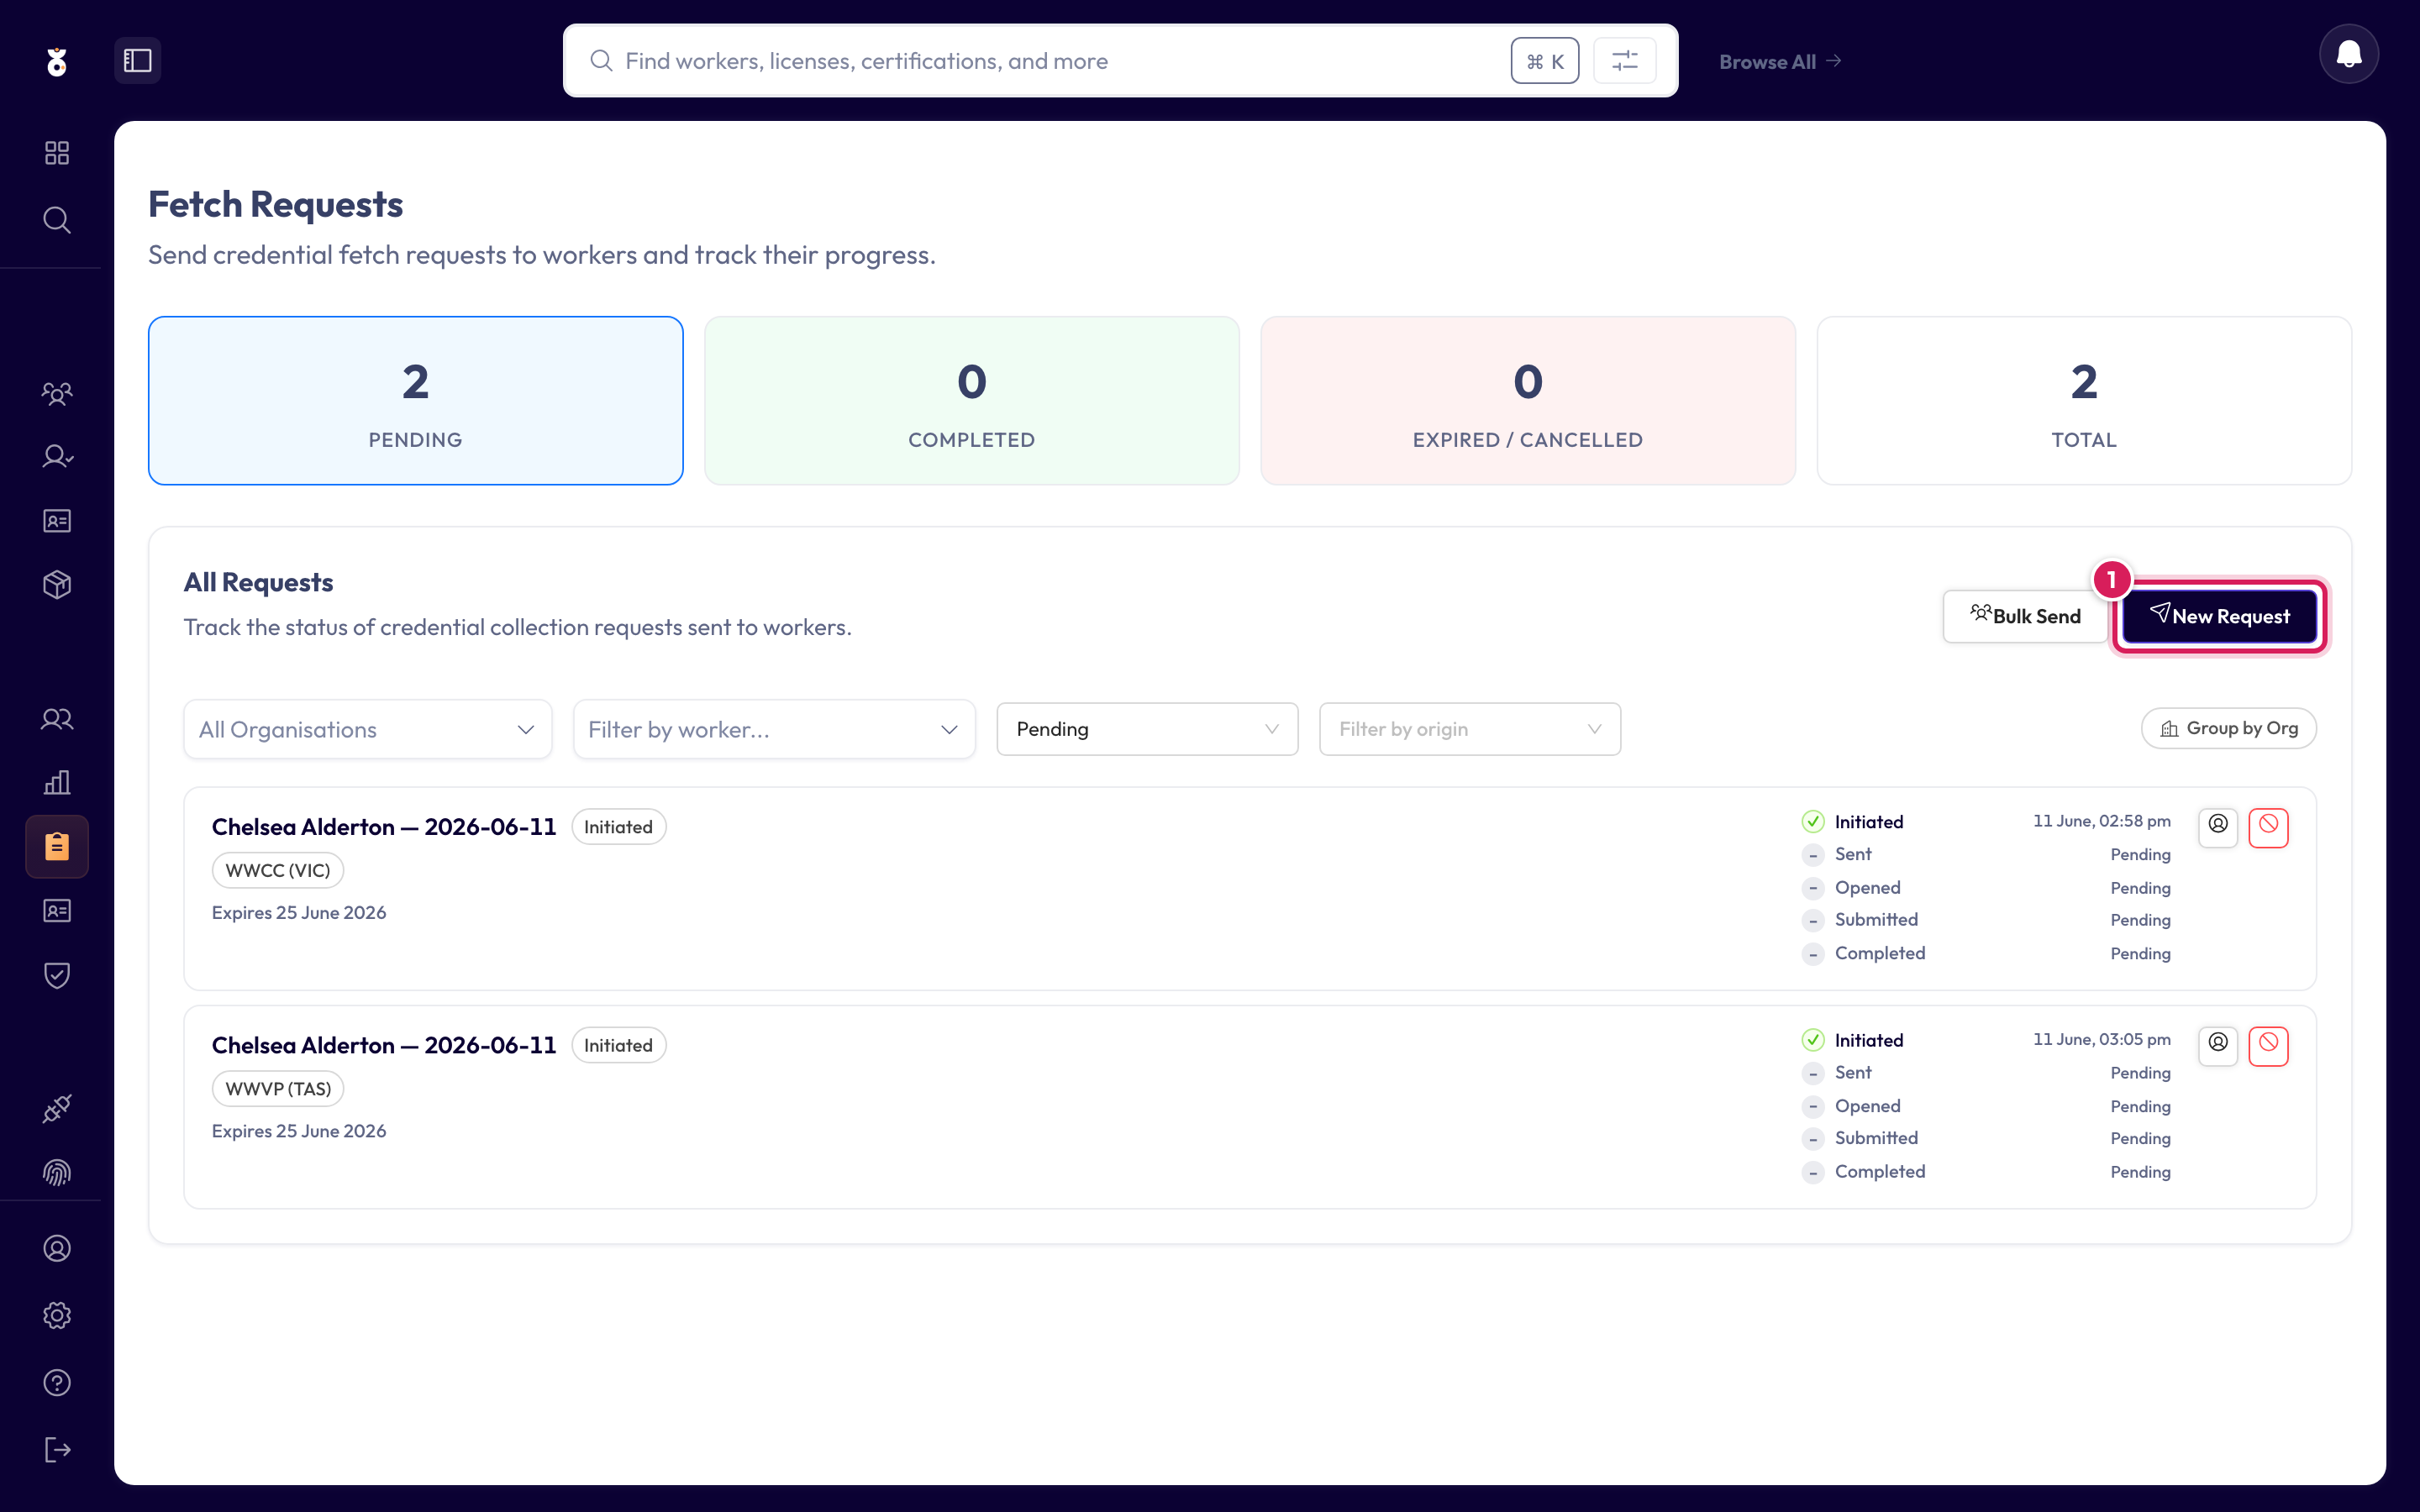
In the left menu under Continuous, click Fetch Requests, then start a new request.
Step 2: Choose the worker
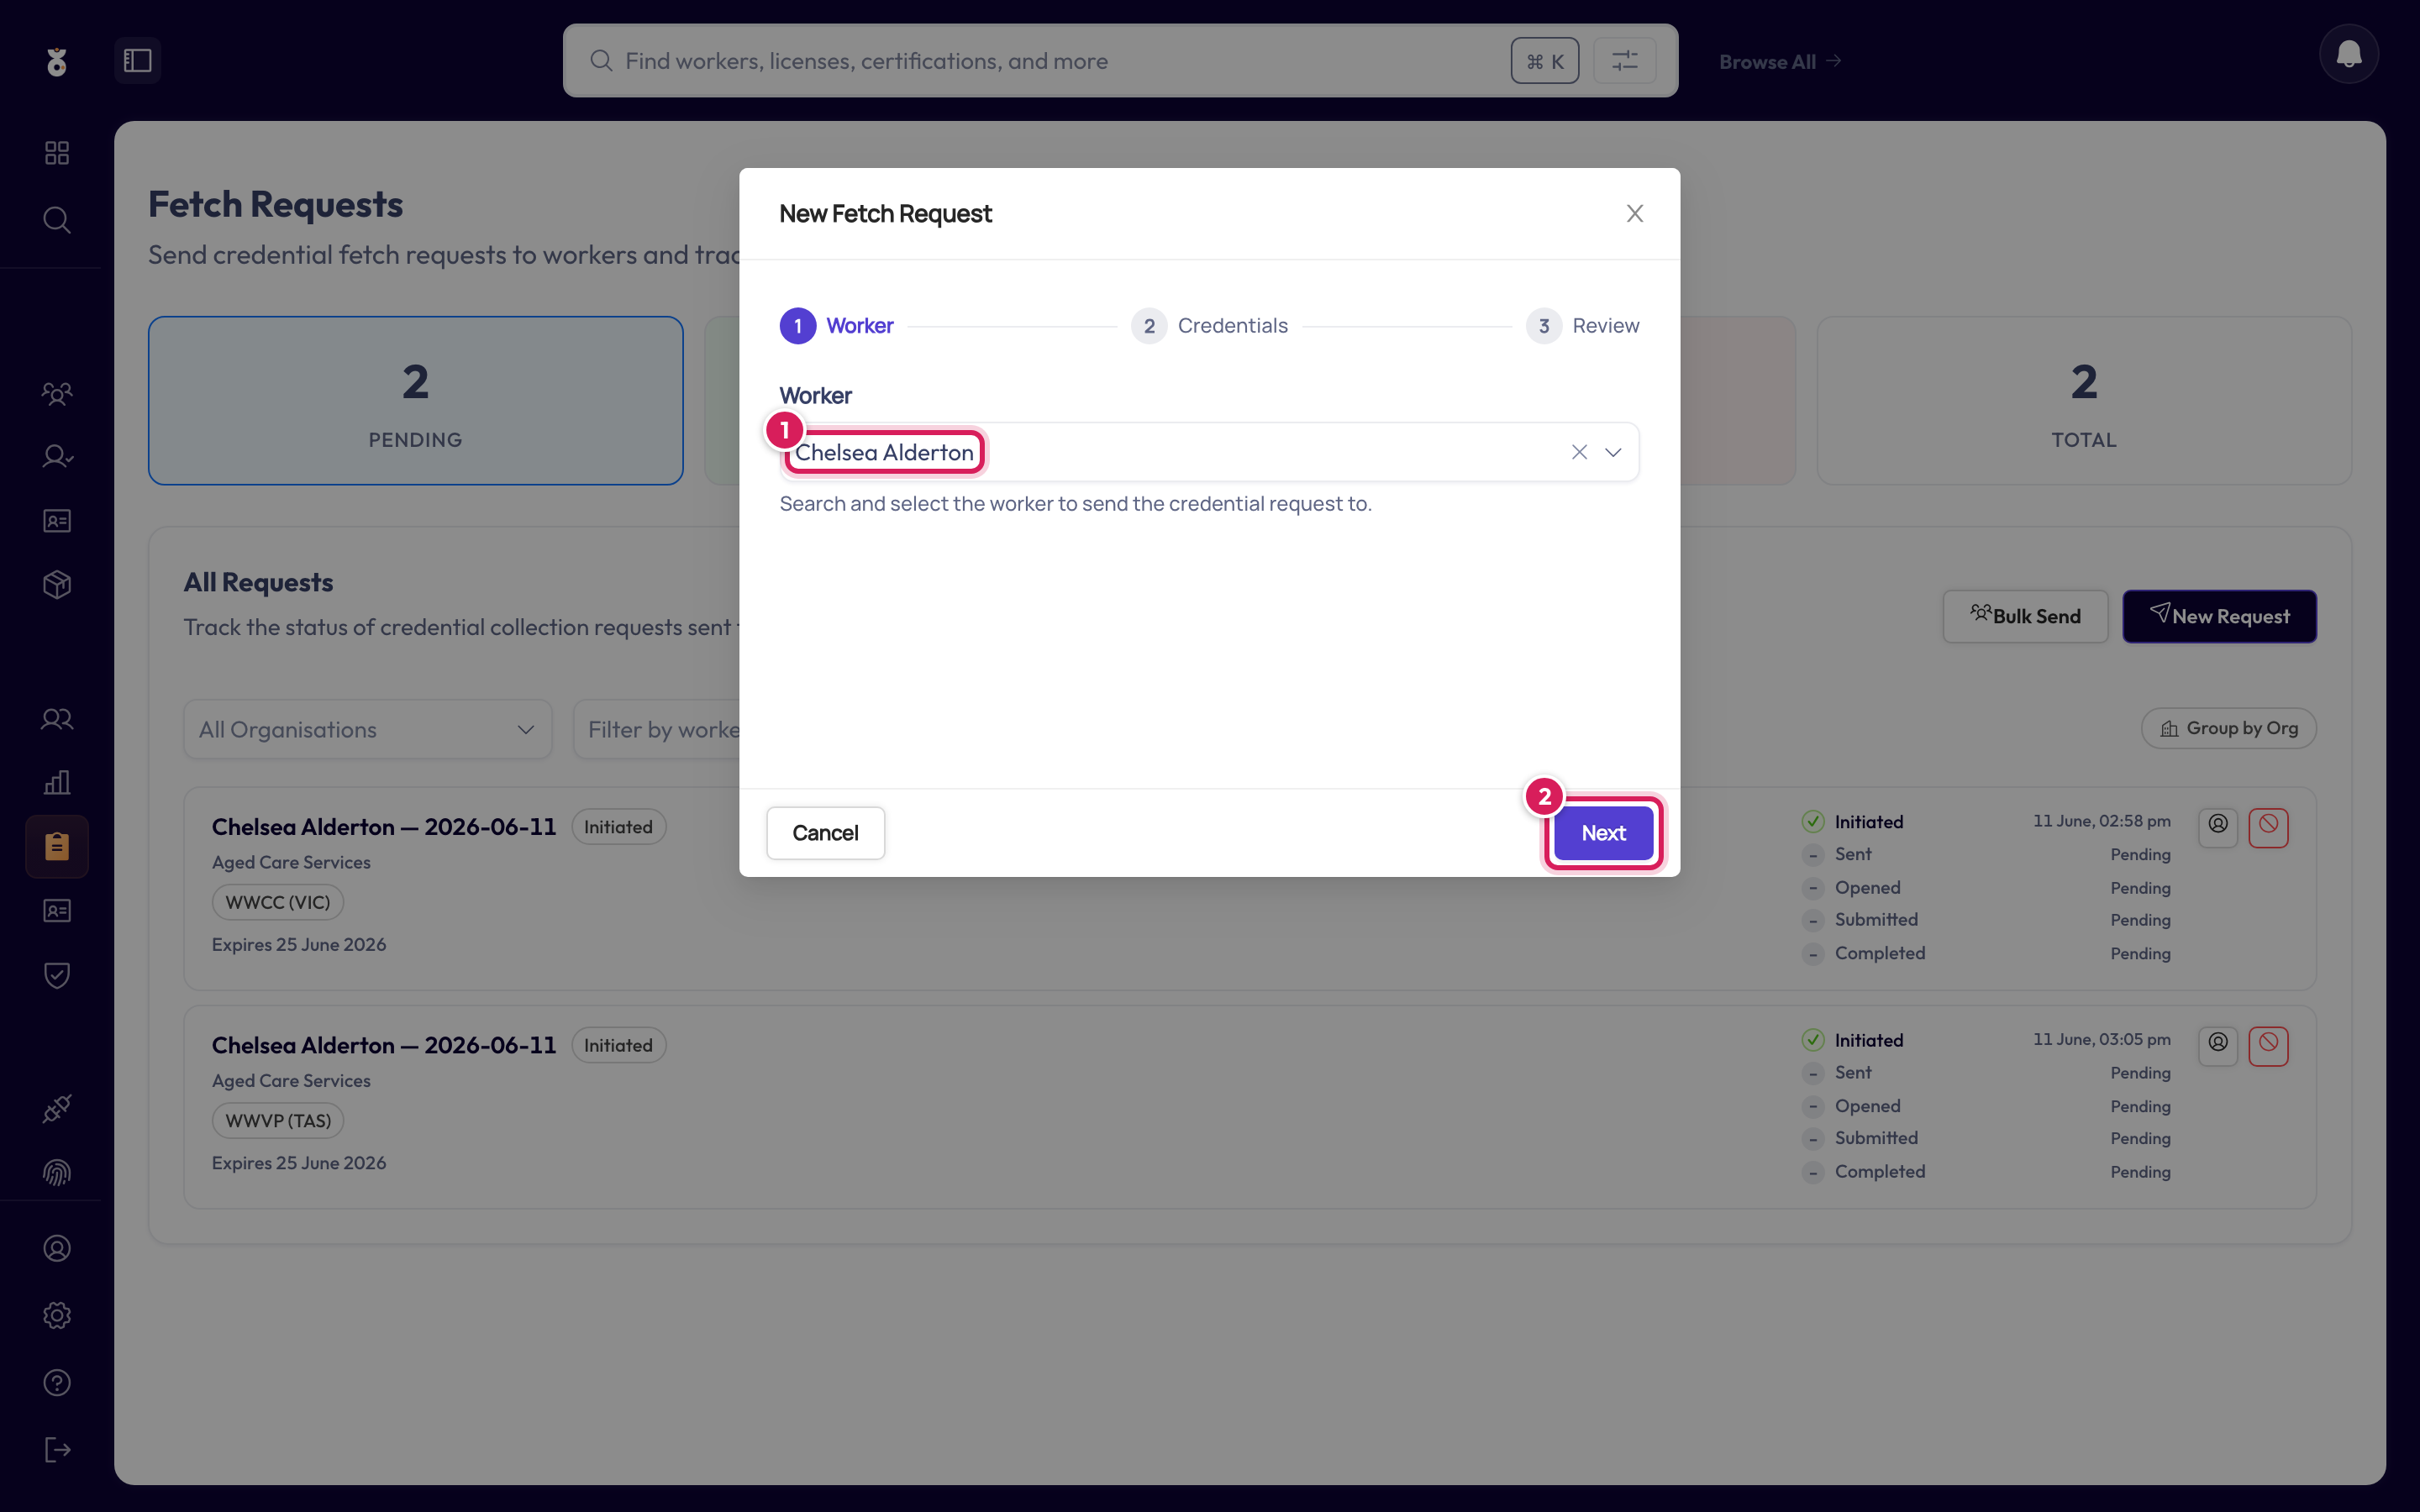
Search by name (1) and click Next (2).
Step 3: Choose the credentials
The list starts with credentials Oho already holds for this worker — handy when you're chasing a renewal of an expired card. Tick what you're asking for (1), use + Add another credential type for anything new, then click Next (2). You can add guiding text per credential — e.g. "Please provide your original certificate, not the wallet card" — which appears on the worker's upload page.
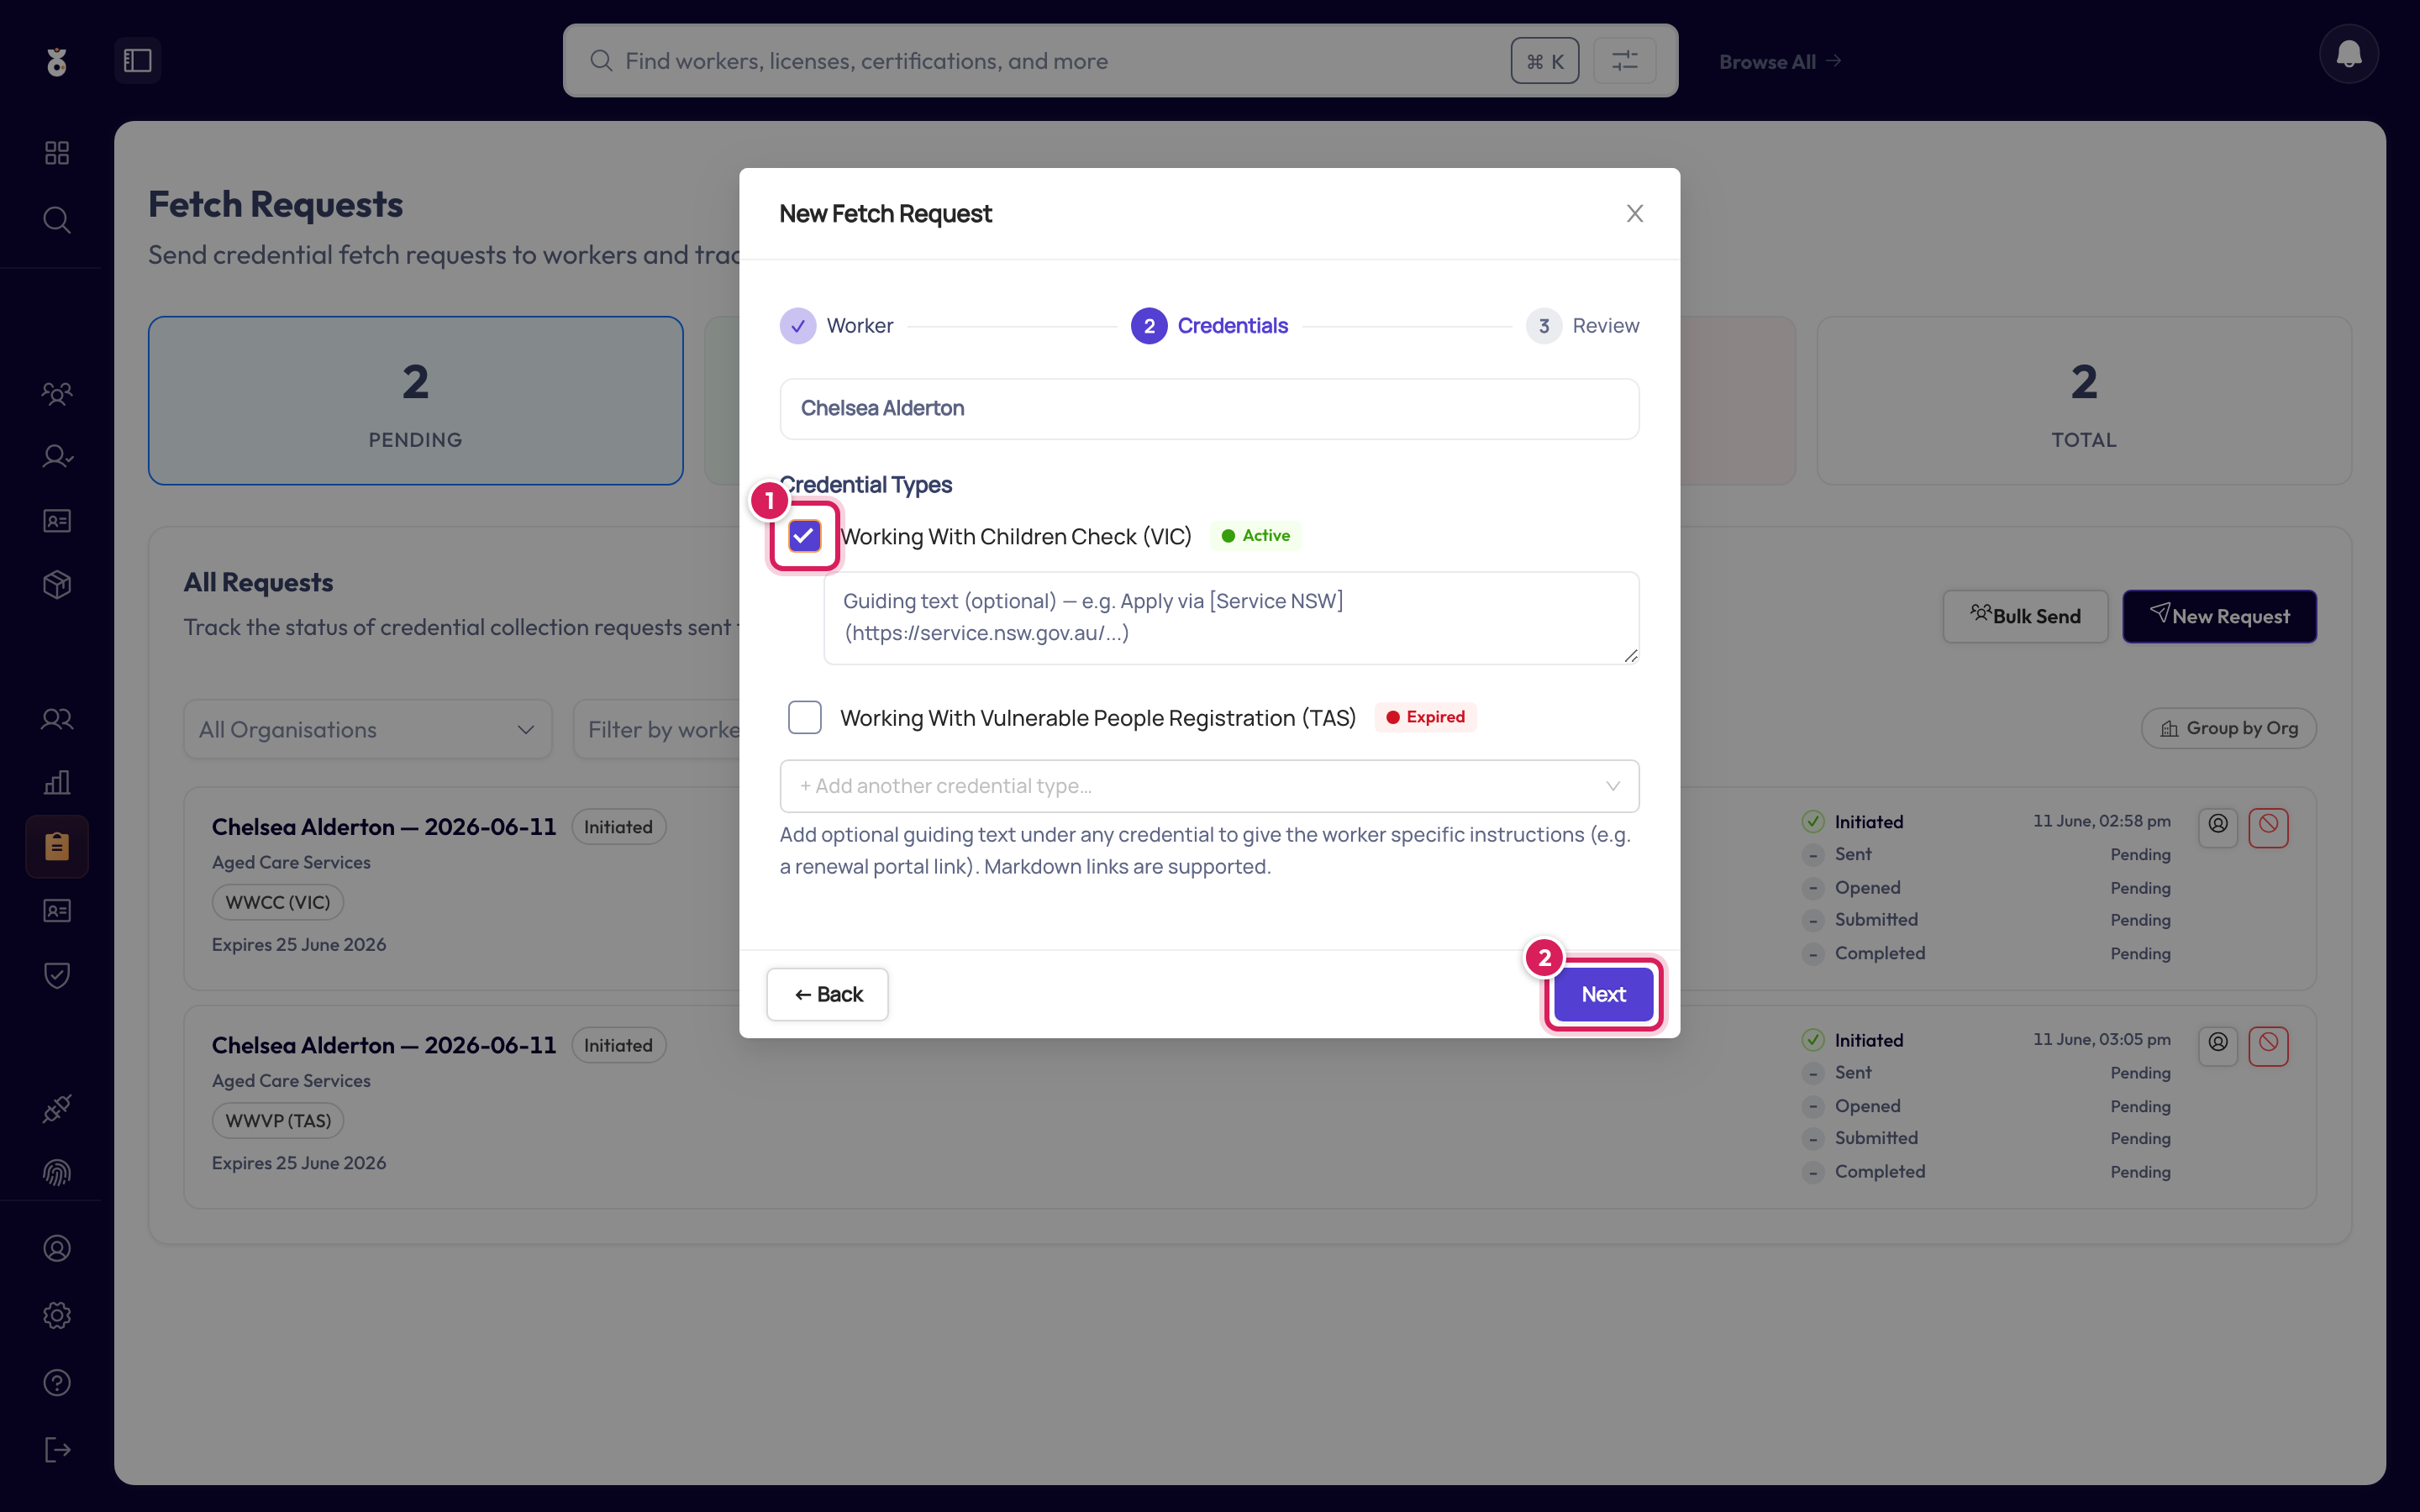
The credential types include any custom credentials your Admin has defined, so you can ask a worker to supply an internal certificate or induction the same way you'd chase a renewed card.
The same step has a Worker Details section, for contact details rather than credentials — see Confirm or update contact details below.
Step 4: Review and send
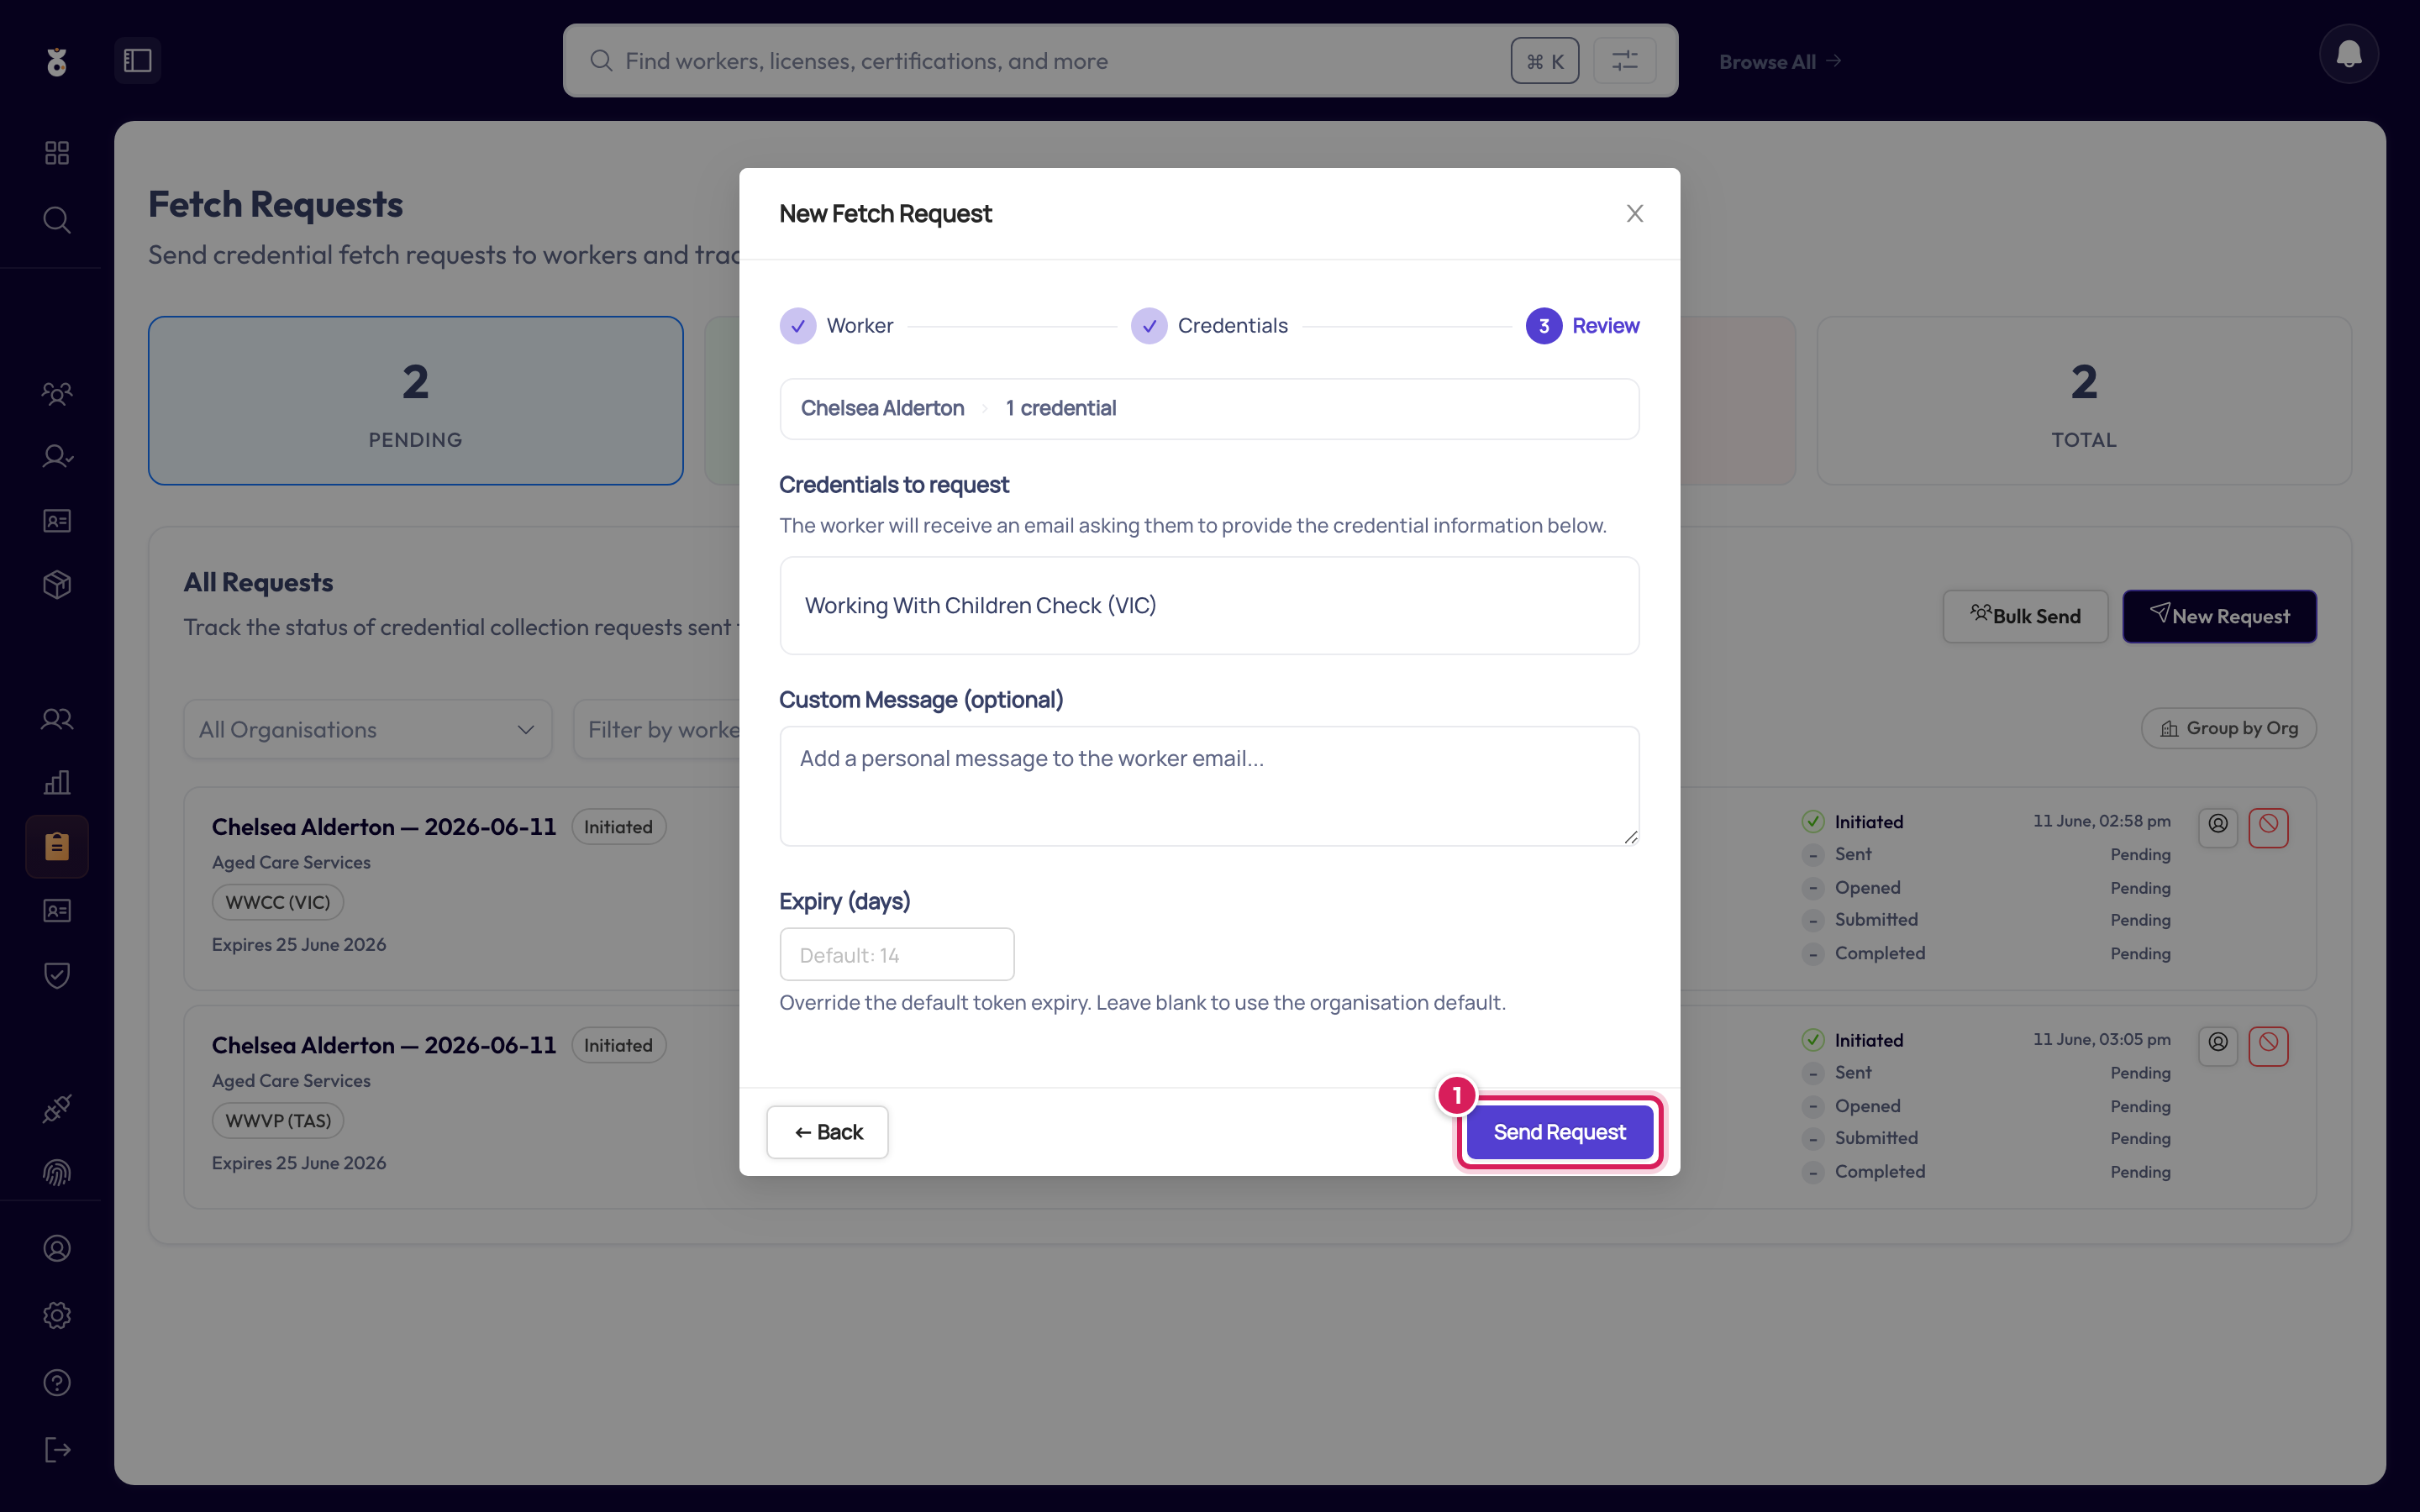
The worker receives an email at their work email address with a secure upload link — they don't need an Oho login.
Track its progress
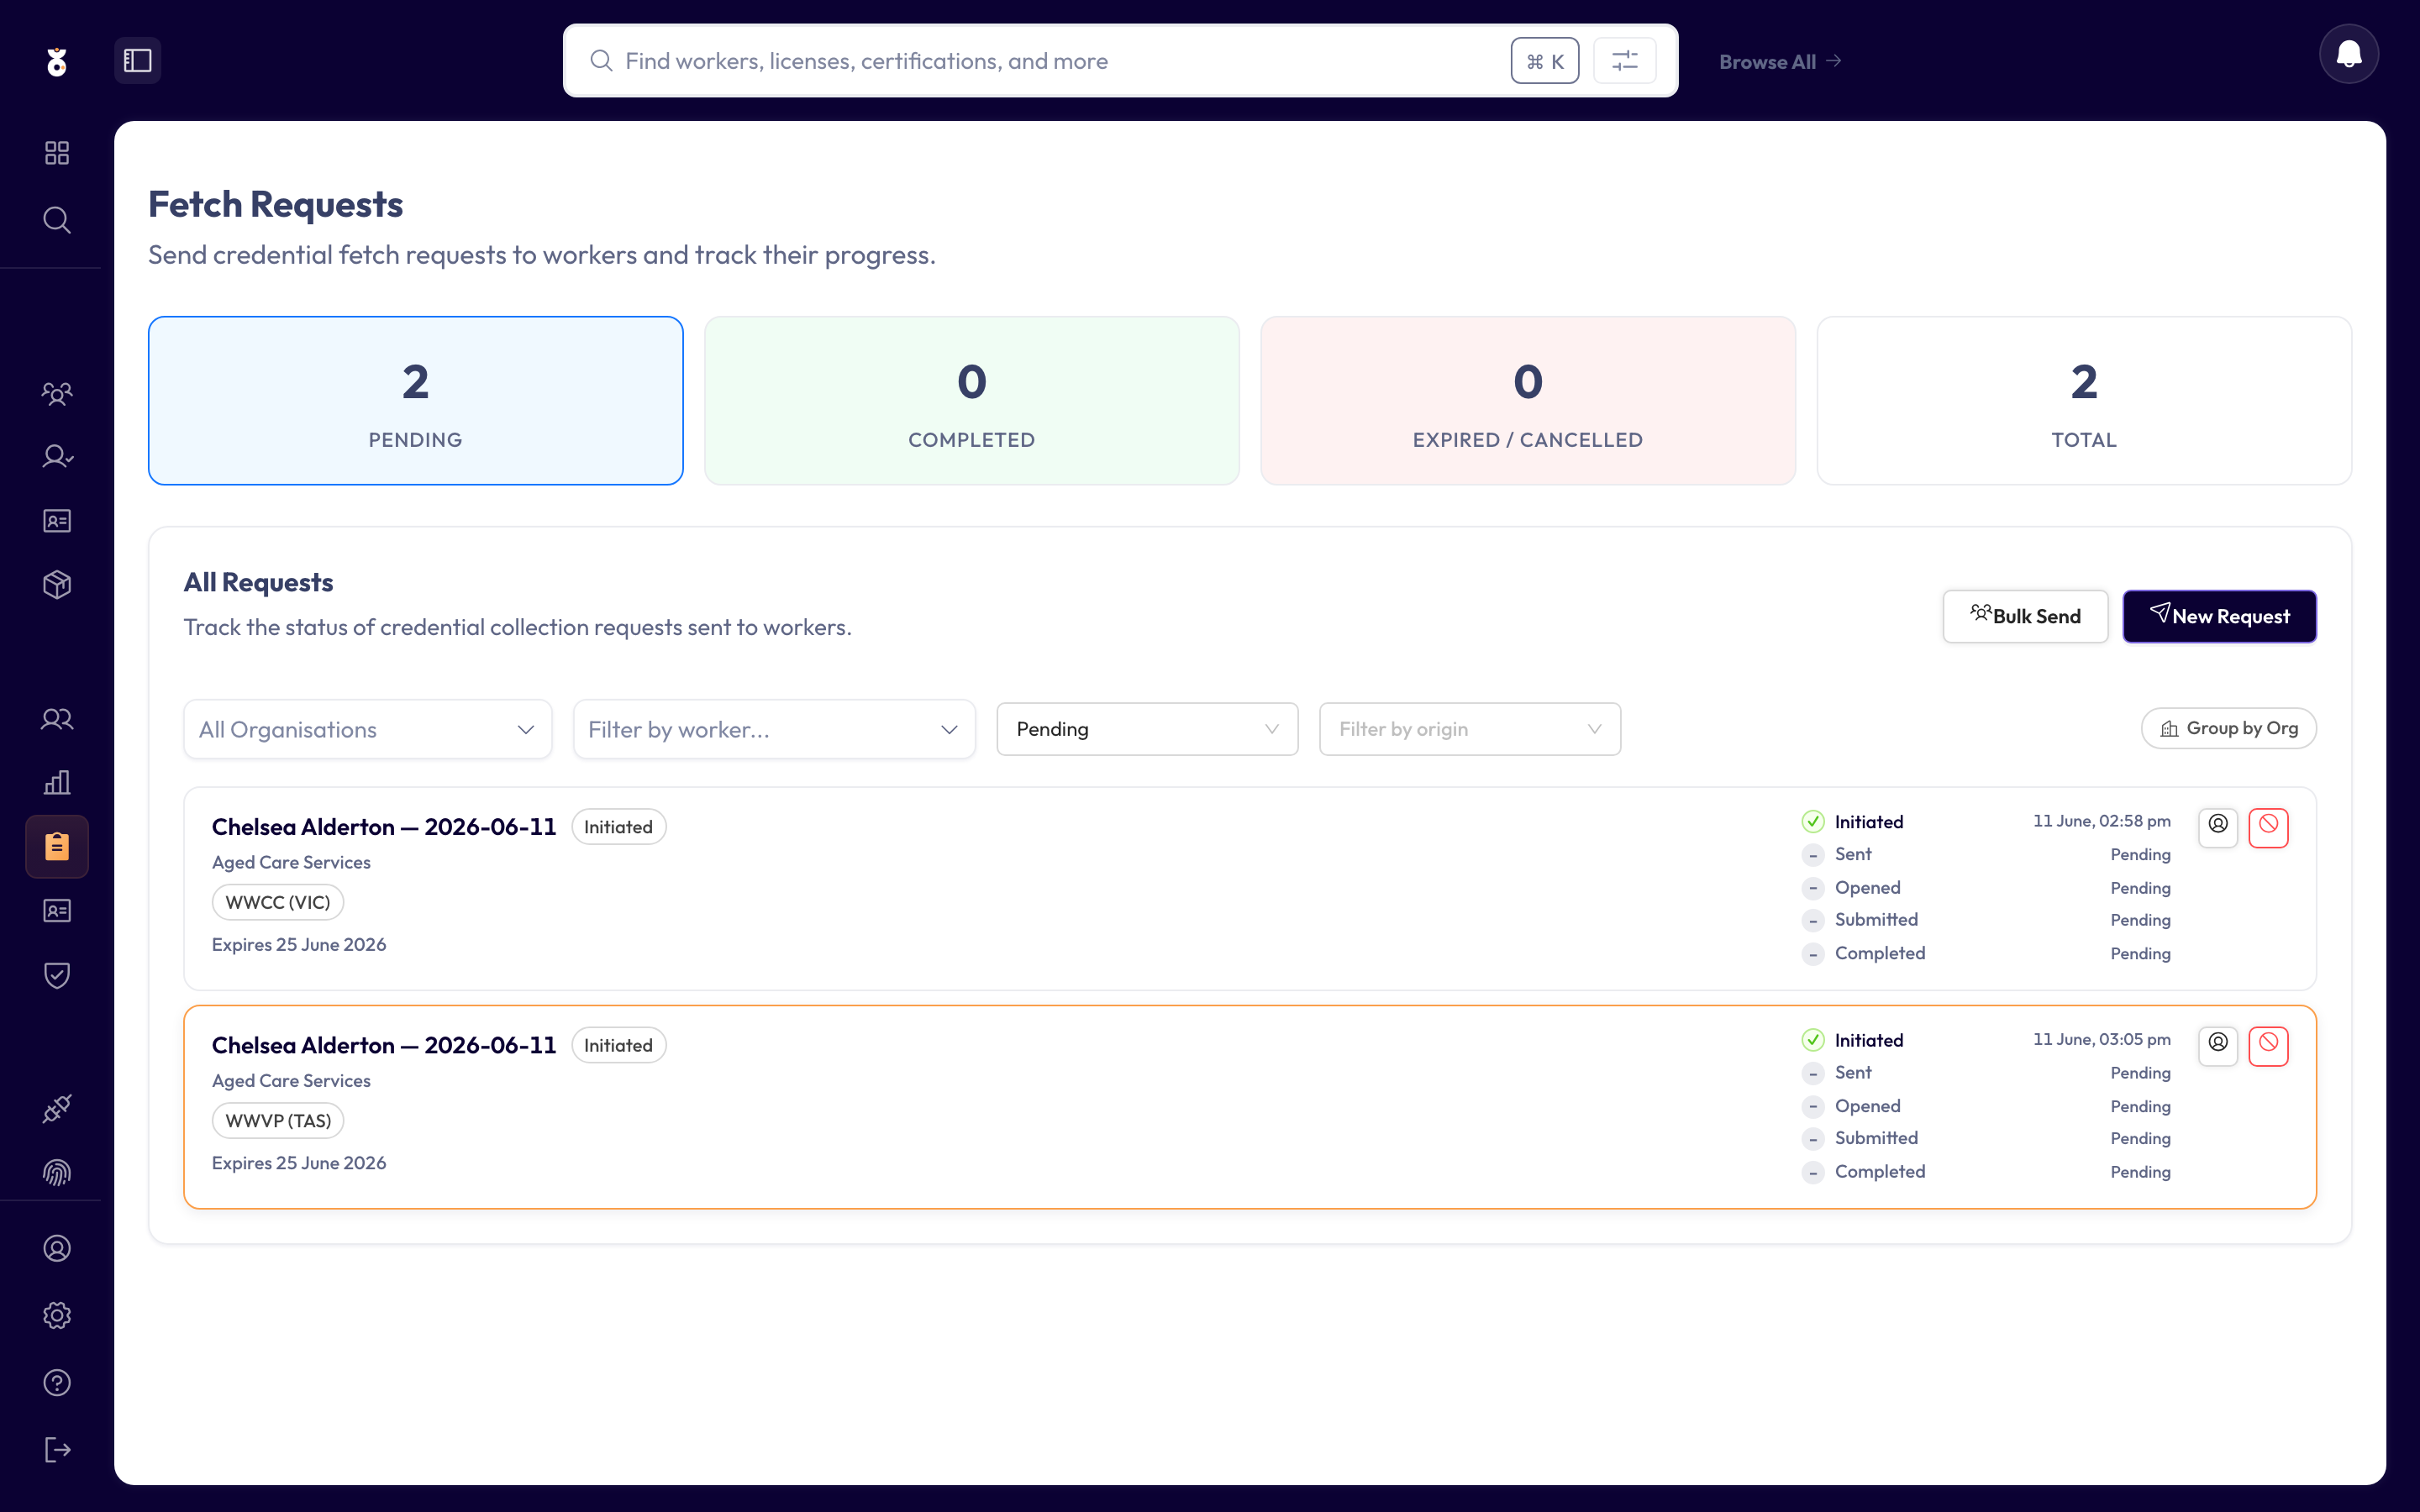
The request appears in the list with its status, which moves from Initiated and Sent through Opened and Submitted to Completed as the worker responds.
These statuses track the worker's side of the conversation only. Completed means they filled in what you asked for — it says nothing about whether the register agrees. Verification is a separate step that runs afterwards, so a completed request can sit alongside a credential still reading Pending. Check the credential, not the request, for the answer.
How long the link lasts
A link stays open for 14 days unless your organisation has changed the default — it's Default Expiry (days) on the Fetch Request Settings card, anywhere from 1 to 90. You can override it for one request with Expiry (days) on the Review step.
Until it expires, the worker can open the link again and correct what they sent — submitting doesn't close it. A second submission updates the first; it doesn't move the request backwards. Once the link has expired the page tells them to contact their administrator, and the answer is a new request. A reminder doesn't extend the expiry.
The same card has a Send by SMS switch. When it's on, workers with an Australian mobile are also texted, and Text when picks which messages: the request, its reminders, or a corrected-document request — see Customise SMS templates.
Confirm or update contact details
A fetch request can ask for a worker's contact details as well as, or instead of, credentials — useful when an address is missing or out of date, or when a register needs it (Victorian WWCC Connect needs all three — see Set up WWC Connect).
On the Choose the credentials step, tick what you need under Worker Details:
- Residential address — street address, suburb, state and postcode
- Personal phone — saved separately from any work number
- Personal email — saved separately from their work address
Whatever you tick becomes a required field on the worker's Your Details page and is saved back to their worker profile. You can tick details and no credentials at all; the request only needs one or the other.
What the worker sees on a details-only request. The page opens on Update your details. The next page shows what Oho already holds for them, so they correct what has changed and submit — they aren't asked to retype what's right. Blank fields never wipe a value already on file.
What you see. The request moves to Submitted and then straight to Completed, because there's no credential to verify. The details are on the worker's profile from that point.
To chase everyone missing an address in one go, use the Worker details card on the Fetch Requests page: Review missing details lists the workers and sends them a details-only request with Send Fetch Request.
Chasing many workers at once
The steps above ask one worker for what you already know they're missing. Bulk Send works the other way round: you pick the credential, and Oho finds the workers who are short of it.
Bulk Send
On the Fetch Requests page, click Bulk Send.
- Pick the credential types. They're grouped by category — Screening checks, Licences, Certifications, Identity documents — and searchable. Each type shows how many workers are missing, expired or expiring, busiest first. Types nobody is currently outstanding for are tucked behind Show n more types nobody is outstanding for; you can still pick them.
- Add anyone else you want to ask under Also ask these workers (optional). The counts above only include workers whose position requires the credential, so this is how you reach someone the rules don't cover.
- Click Find workers — the button names roughly how many requests that will be.
- Review before anything goes out. The review step lists every worker with their credential types, marks anyone who already has a request pending, and lets you untick individuals or add per-credential guiding text. Nothing is sent until you click Send n Requests.
If no one is short of the types you picked, Oho says so rather than sending an empty batch — add workers by hand if you want to ask anyway.
From the Compliance Overview
The Requires Attention queue sends the same requests without leaving the page:
- Request info on a batch row asks everyone in that batch at once.
- Request info on a status group covers every credential in the group — all the expired ones, say — in a single pass.
- Or select workers individually and use Request info on the selection.
Each route opens the same review step, so you always see who is being asked for what before it sends.
Work the Fetch Requests list
The tiles at the top count every request you can see:
- Total: every fetch request.
- Pending: sent and not finished yet. That covers requests that are initiated, sent, opened, partly filled in, or submitted and still being verified.
- Completed: the worker responded and every credential has had at least one check.
- Expired / Cancelled: links that ran out before the worker responded, and requests someone cancelled.
Click a tile to filter the list to it. Under All Requests you can narrow the list further:
- All Organisations: one organisation's workers.
- Filter by worker...: one worker's requests.
- Filter by status: Pending, Submitted, Completed, Expired / Cancelled, Expired or Cancelled.
- Filter by origin: Compliance shows only requests Oho sent on its own because a worker's position needs a credential they don't hold.
- Group by Org splits the list by organisation.
On each row, View worker profile opens the worker, Send reminder emails them again, and Cancel request withdraws a request that hasn't been submitted yet. New Request sends one to a single worker.
Who sees which requests
"Every request you can see" means every request for a worker in the organisations you're assigned to — not the ones you personally sent. There's no "mine" and "theirs" here: a colleague assigned to the same organisation sees your requests, can remind on them and can cancel them, and you see theirs.
That's what makes leave cover work. If someone needs to pick up your queue while you're away, the thing to check is that they're assigned the same organisations as you — not who sent what. A Super Admin sees every request in the business.
Two things narrow it further:
- No organisations assigned, no requests. Someone with an empty Organisation column sees an empty list rather than everything — the scoping fails closed. Manage your users is where you fix that.
- Continuous access is required. Fetch requests sit on the Continuous side of Oho, so someone scoped to Recruit only can't open the page at all.
The same rule governs recruitment check requests, on the Recruit side.
Common questions
The worker didn't get the email, or it arrived days late
Start with the request's status in the list — it tells you how far the email got.
- Initiated — it was never sent. Almost always the worker has no email address on file; see Before you start. Add one and send a new request.
- Sent — Oho handed the email over for delivery; the worker hasn't opened the link yet. Check the address on their profile is the one they actually read (Oho uses the work email first), and ask them to look in spam or junk. Workplace mail systems sometimes quarantine automated email, which can hold it back for days until someone releases it — their IT team can check. Then use Send reminder on the row to send it again.
- Opened — the email arrived and the worker has been to the page. They haven't submitted yet.
Send reminder is available while a request is Sent, Opened or Partial. Reminders also go out automatically after the number of days set in Auto-Reminder After (days). If the link has expired, send a new request instead.
If the status says Sent and the worker is sure nothing is in spam or quarantine, email [email protected] with the worker and roughly when you sent it — support can see whether the email was delivered.
The worker sent the wrong thing
They can open the same link again and correct it any time before it expires — see How long the link lasts.